


I make my prints with the lino-cut method of printmaking. This means that once I have made a drawing I’m happy with, I take a small piece of linoleum, and with a little gouging tool, I carve my image into it. The bits of surface which remain untouched will be printed, and the bits I gouge out will be empty space. Everything will end up as a mirror-image, so I have to remember to put the text back to front, and sometimes the image too.
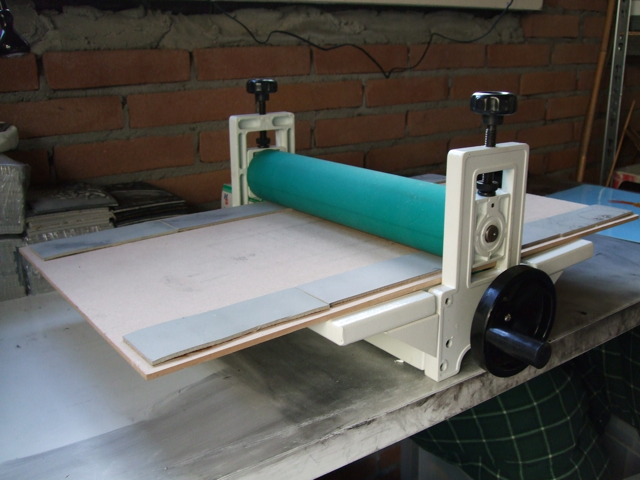
I roll black rubber-based ink onto the surface of the print, and then wind it through my little etching press with paper on top – the amount of pressure depends on the texture of the paper. Each print still comes out differently every time, because of variations in paper, ink, pressure and a host of other factors.


The prints are hung up on a line to dry. I leave them overnight, and often longer just in case; then the ink is dry and completely waterproof. I can get my acrylic inks out, and brush the vivid colours in using the same method as watercolour painting. This ink is also waterproof, and dries incredibly fast, so I have to be careful what I’m doing with it.
The process is slow and painstaking, and I take great care over every single print. There are always impressions which don’t quite work, and colouring which doesn’t make the grade, and I only keep the finished products that I’m really happy with.


I have also made illustrated step by step tutorials about the more complicated reduction print process, and about how to get the perfect registration every time.
